 Poradil vám niekto, aby ste si povinné zmluvné poistenie hľadali na internete? Alebo ste tu len z vlastnej zvedavosti? Každopádne bol tento krok veľmi správny, pretože cena cez online PZP z Uzavripzp je tá najlacnejšia, ktorú dokážete nájsť. S konkrétnymi dôvodmi nášho tvrdenia vás oboznámime nižšie. Teraz si však povedzme, prečo tento typ poistenia nezanedbávať. Zákonné poistenie by ste nemali vynechať zo zoznamu vašich povinností hlavne z toho dôvodu, že ho určuje zákon. Vzťahuje sa na:
- motorové vozidlá s evidenčným číslom (automobil, motocykel),
- nemotorové vozidlá s evidenčným číslom (prívesný vozík)
- ako aj na niektoré motorové vozidlá bez evidenčného čísla (vysokozdvižné vozíky, špeciálne poľnohospodárske prístroje).
Snažte sa nezanedbať ani jeden typ poistenia vozidla a takisto sa snažte kontrolovať dátumy konca vašich súčasných poistení.
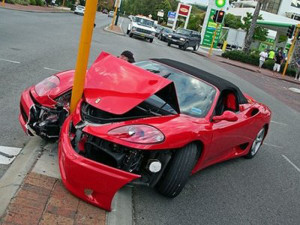
V prípade, že poistenie nemáte uzatvorené a budete kontrolovaný hliadkou Policajného zboru, tá vás môže pokutovať. A to čiastkami vyššími ako býva suma za ročné povinné zmluvné poistenie. A to nie je všetko. Pretože ak s nepoistením vozidlom spôsobíte dopravnú nehodu a škodu jednému alebo viacerým vozidlám, okrem tejto škody budete musieť zaplatiť aj pokutu za nerešpektovanie zákonných nariadení. Takéto pokuty môžu presiahnuť aj milióny eur. Preto sa neulakomte na zopár desiatok eur a pre vaše dobro si toto poistenie uzatvorte čo najskôr. Teda ak ho stále ešte nemáte.
Najlacnejšie PZP na auto je online
Ak hľadáte najlacnejšie poistenie auta, sústreďte sa prvotne na PZP online. Stačí ak si kliknete na označený odkaz a uistíte sa, že naše tvrdenie nie je vôbec prehnané. Budete presmerovaný na stránku, ktorá spolupracuje s niekoľkými poisťovacími spoločnosťami. Funguje tak, že po zadaní niekoľkých údajov ohľadom vozidla, ktoré chcete poistiť, vám systém vygeneruje porovnanie poistenia auta jednotlivých poisťovní. Z nich si môžete vybrať také, ktoré vám najviac vyhovuje. PZP online môžete vyskúšať len tak, zo zvedavosti, to znamená, bez toho, aby ste boli nútený si nejaké poistenie cez kalkulačku zvoliť. Jedine takto prídete na všetky jeho výhody. Ak váhate nad tým, či ho vyskúšať, hoci aj nezáväzne, poskytneme vám dva hlavné dôvody, prečo sa spoliehať práve na tento spôsob požiadania o povinné zmluvné poistenie auta.
 PZP online je výhodné, pretože ušetrí váš čas. Koľko pobočiek poisťovacích spoločností sa nachádza vo vašom meste? Jedna alebo dve? Alebo možno žiadna? Ak by ste chceli zistiť cenové ponuky viacerých agentúr, zabralo by vám to nielen niekoľko hodín času, ale aj niekoľko dní, ak plánujete jednotlivé stretnutie absolvovať po príchode z práce. Treba brať do úvahy aj fakt, že aj spoločnosti majú istú otváraciu dobu, zatiaľ čo s PZP online sa nemusíte strachovať, že vám zabuchne dvere pred nosom. Týmto spôsobom si môžete o vaše zákonné poistenie auta požiadať doslova aj o polnoci. Do jedného jediného formulára vypíšete niekoľko údajov týkajúcich sa vášho vozidla a do 10 minút máte presné porovnanie jednotlivých ponúk z viacerých poisťovacích spoločností. Ostane vám už len sa rozhodnúť, ktoré poistenie je pre vás výhodnejšie.
Ušetrí nielen peniaze…
PZP online je najlacnejšie a okrem iného ušetrí vaše peniaze aj z iného hľadiska. Každý pracovník v kamennej pobočke poisťovacej spoločnosti vám bude tvrdiť, že to ich poistenie je najlacnejšie a najlepšie. Ak si nepochodíte aj ostatných, nebudete vedieť, či to je pravda alebo nie. Alebo stačí, ak sa spoľahnete na PZP online, ktoré vám toto tvrdenie vyvráti, prípadne potvrdí. Po zadaní údajov o vozidle vám vybehne porovnanie povinného zmluvného poistenia, ktoré vám dokáže, že to isté poistenie sa môže v jednotlivých spoločnostiach líšiť až v stovkách eur. Hľadáte najlacnejšie poistenie na Fiat? Alebo na Mitsubishi? Alebo na inú značku? Jednoznačne ho získate online.
Vyššie sme sa zmienili o tom, že PZP online ušetrí vaše peniaze aj z iného hľadiska. Z akého? Táto úspora súvisí s úsporou času, a to konkrétne s cestovaním do kamenných pobočiek, ktoré môže opäť predstavovať finančné straty buď za dopravu verejným dopravným prostriedkom alebo autom. Takže neušetríte „len“ niekoľko stoviek za samotné poistenie auta, ale ešte aj niekoľko desiatok eur za ušetrenú cestu. Tak prečo nevyužiť tento šetrný spôsob požiadania?
Porovnanie PZP
PZP online funguje na základe porovnania jednotlivých ponúk poisťovacích spoločností. Do formulára na stránke, ku ktorej sme vám dali prístup vo vyššie označenom linku, treba vpísať niekoľko údajov, pomocou ktorých vám budú vypočítané jednotlivé ponuky spoločností. Ide o údaje ohľadom vozidla, ktoré chcete poistiť, ako aj o údaje o majiteľovi vozidla.
V prvom rade si musíte vybrať typ vozidla, a to či ide o:
- osobný automobil do 3,5 tony,
- o motocykel,
- o prívesný vozík
- alebo o dodávku do 3,5 tony.
Ďalej nasleduje vypísanie konkrétnejších údajov ako napr.:
- miesto, kde sa momentálne vozidlo nachádza,
- účel jeho využitia,
- počet kilometrov najazdených za rok,
- značka a model vozidla,
- rok jeho výroby,
- najväčšia prípustná hmotnosť,
- prevádzková hmotnosť,
- objem a výkon motora
- lebo aj typ paliva vozidla.
V druhom kroku, ale stále v tom istom formulári, je potrebné vypísať údaje o vás resp. o majiteľovi vozidla, ktoré chcete poistiť:
- dátum narodenia,
- dátum získania vodičského preukazu,
- číslo tohto preukazu,
- či ste už niekedy spôsobili nejakú nehodu, ak áno, ako dlho ste už žiadnu nehodu nemali,
- mesto a PSČ miesta, kde bývate.
Cenu poistenia tieto údaje neovplyvňujú, až na spôsobenú nehodovú udalosť, no môžu ju ovplyvniť napríklad to, či máte dieťa do 15 rokov, účet v OTP banke, či platíte nejaký iný druh poistenia, odkedy chcete, aby poistenie auta platilo, prípadne či máte už niekde dané vozidlo poistené.
Oplatí sa teda?
Po vyplnení všetkých údajov len kliknete na „porovnať ceny“ a o niekoľko sekúnd vám vybehne viacero ponúk na vaše vozidlo. Z nich si môžete, ale nemusíte, vybrať tú, ktorá sa vám najviac pozdáva. Kliknete na danú ponuku a vypíšete vašu mailovú adresu, na ktorú vám bude doručený návrh zmluvy, jej podmienky, údaje na zaplatenie poistného, ako aj zelená karta, ktorá však bude platiť len 30 dní. Do tejto doby je potrebné toto poistenie zaplatiť, ináč zanikne. Ak ste už poistenie zaplatili, do niekoľkých dní vám bude poštou doručená originál zelená karta, s ktorou už môžete vaše vozidlo naplno využívať aj v zahraničí.
Presvedčili sme vás o výhodách online žiadosti? Ak nie, viac informácií si môžete naštudovať tu http://www.finance.gov.sk/Default.aspx?CatID=3842 , ktorá sa takisto venuje tejto populárnej téme, akou je PZP online.